Fixture Setup
Before you can use fixture control, presets, or effects, you need to configure your light fixtures in the DMX Core 100. This involves importing a fixture profile and creating fixture instances that match your physical setup.
Fixture Profiles
A fixture profile describes the capabilities of a specific light fixture model — its DMX channels, functions (color, dimmer, pan/tilt, etc.), and personalities (channel modes).
Built-in Generic Profiles
The DMX Core 100 ships with built-in generic profiles for common RGB and RGBW fixtures — PAR washes and LED strips/pixels. For these simple fixtures you don’t need to import anything; just select the matching generic profile when adding a fixture.
Importing Profiles
The DMX Core 100 supports importing profiles from three popular fixture libraries:
- Lightkey — Download the fixture profile file
- Daslight (SSL2) — Download the SSL2 profile file
- GDTF Share — Download the GDTF (General Device Type Format) file, an open standard supported by many fixture manufacturers
If none of these libraries has your fixture — common with unbranded fixtures — an AI assistant can build a profile from photos of the fixture’s manual. See AI-Generated Fixture Profiles.
To import a profile:
- Download the profile file from one of the supported libraries
- Upload it to the device using one of these methods:
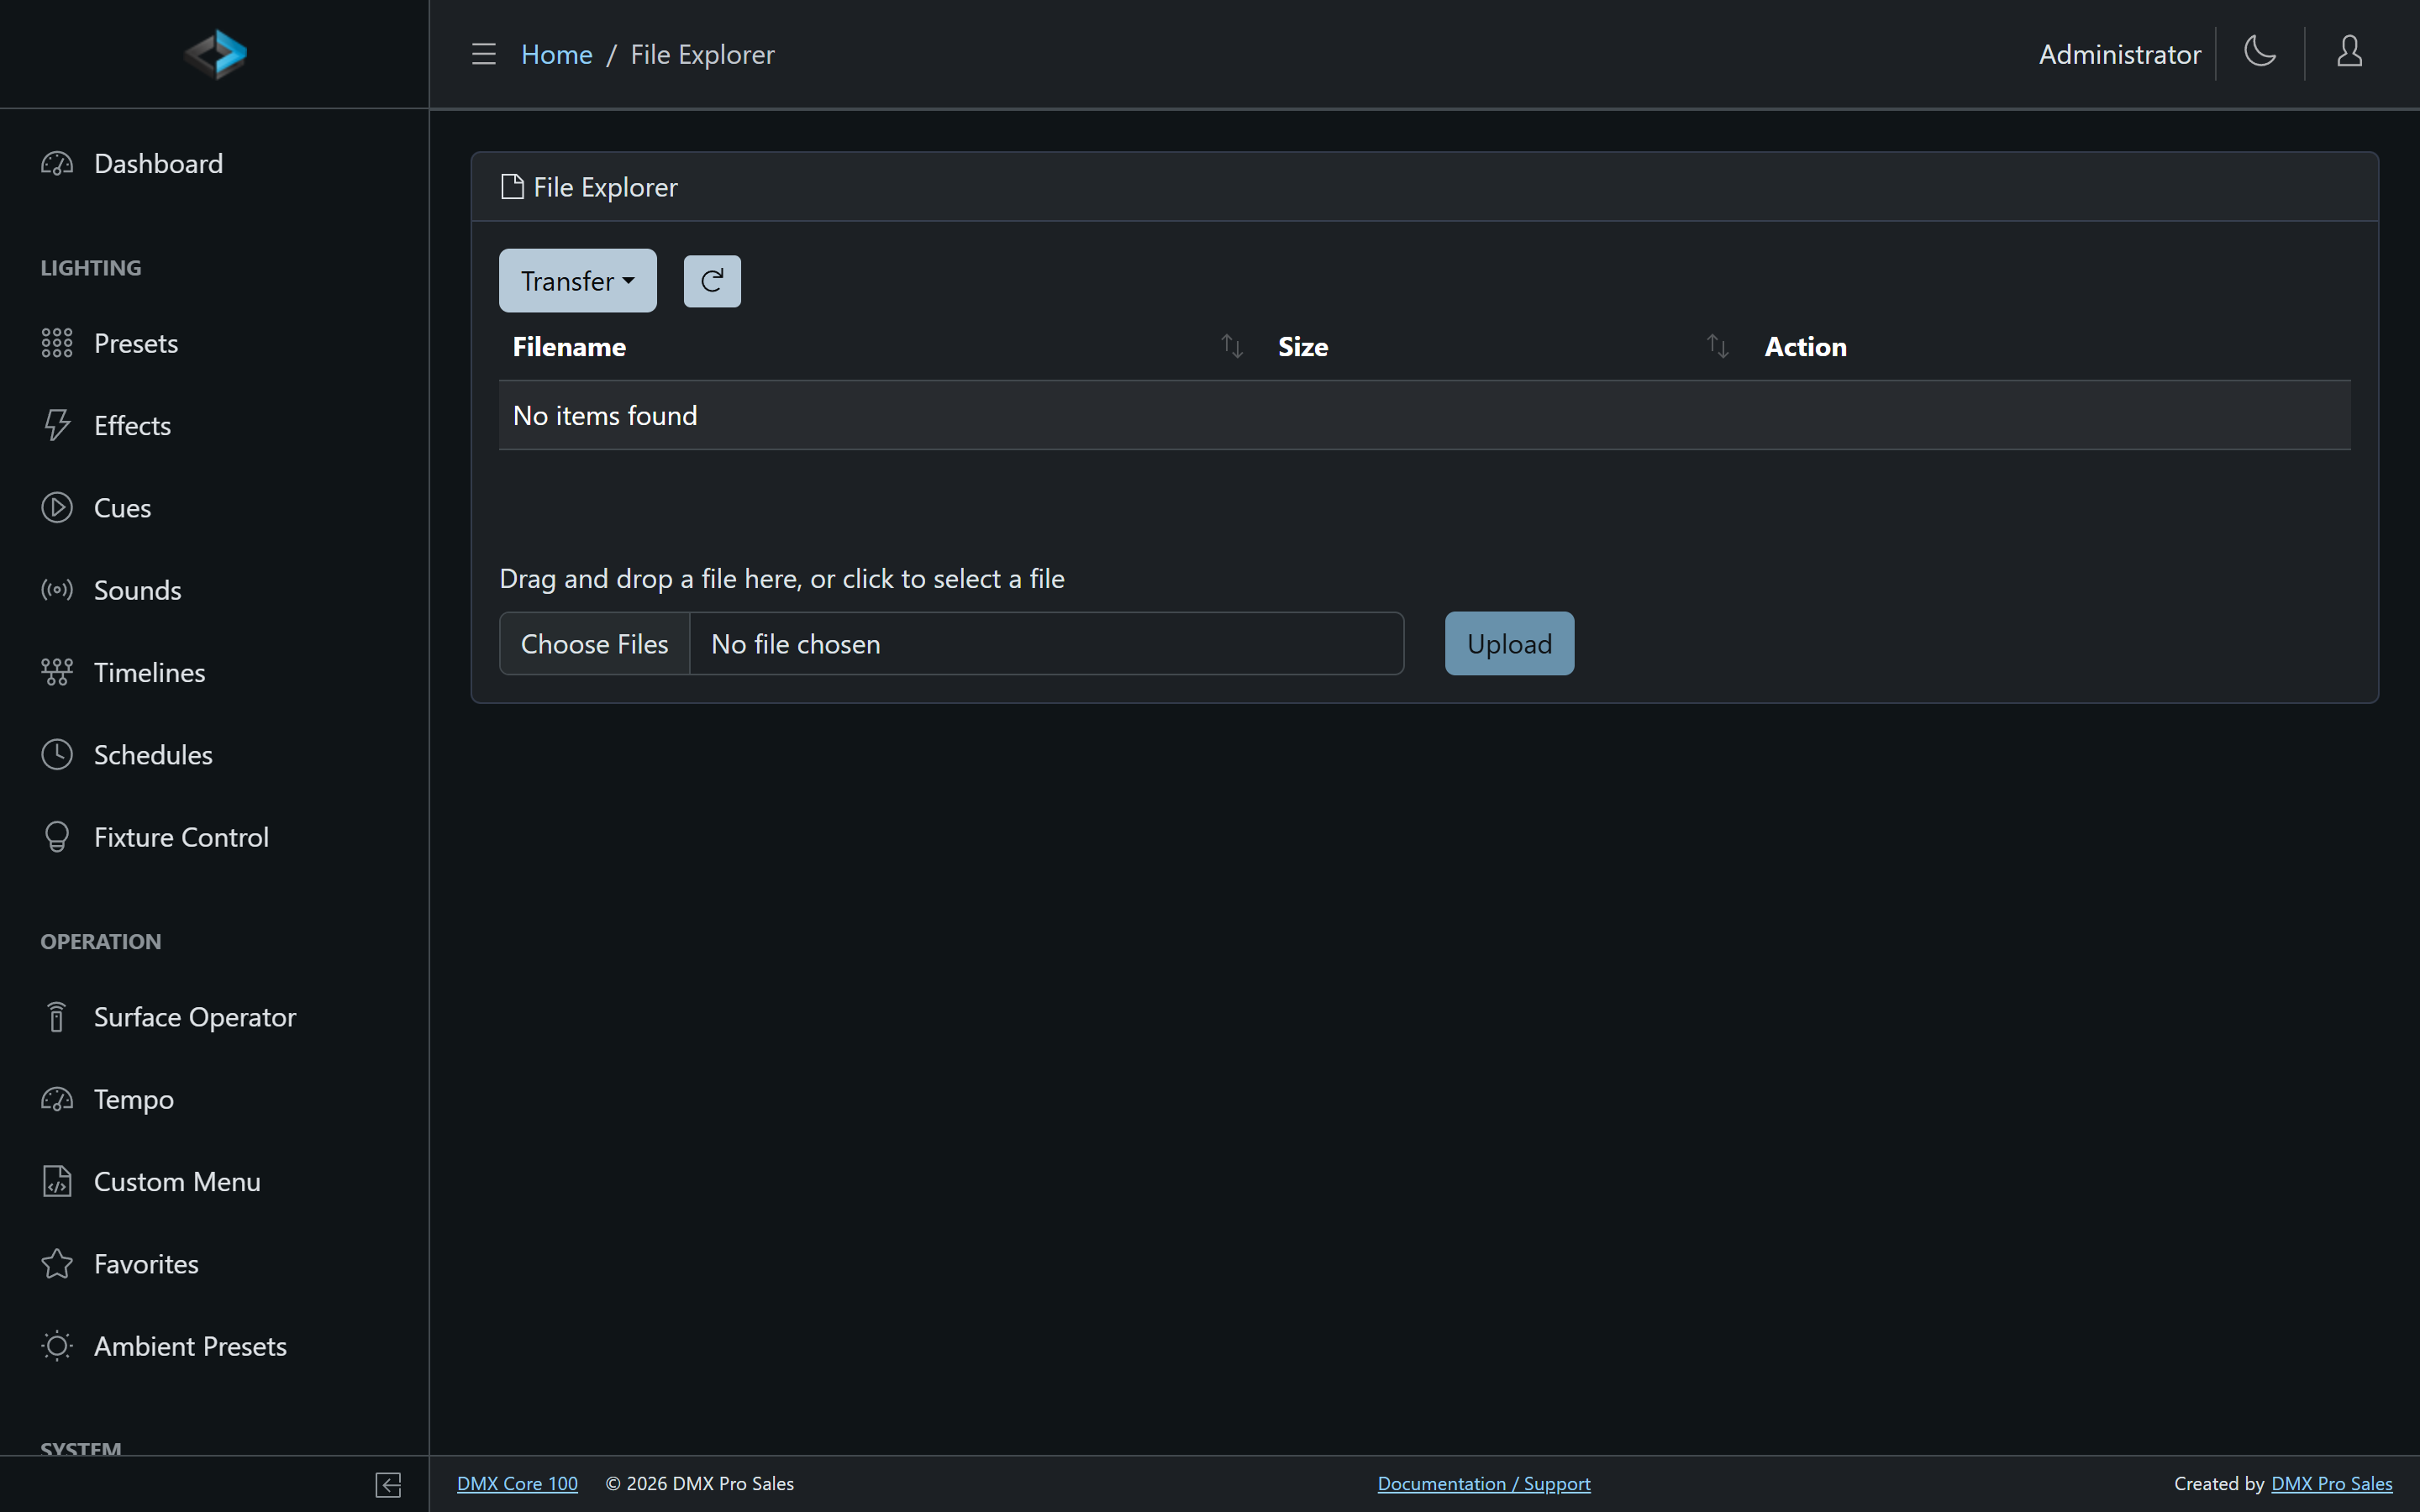
- Web UI: Go to File Explorer, upload the file, then import it
- USB: Copy the file to a USB memory stick, plug it into the DMX Core 100, and use Utilities > File Explorer on the touchscreen to import
Adding Fixtures
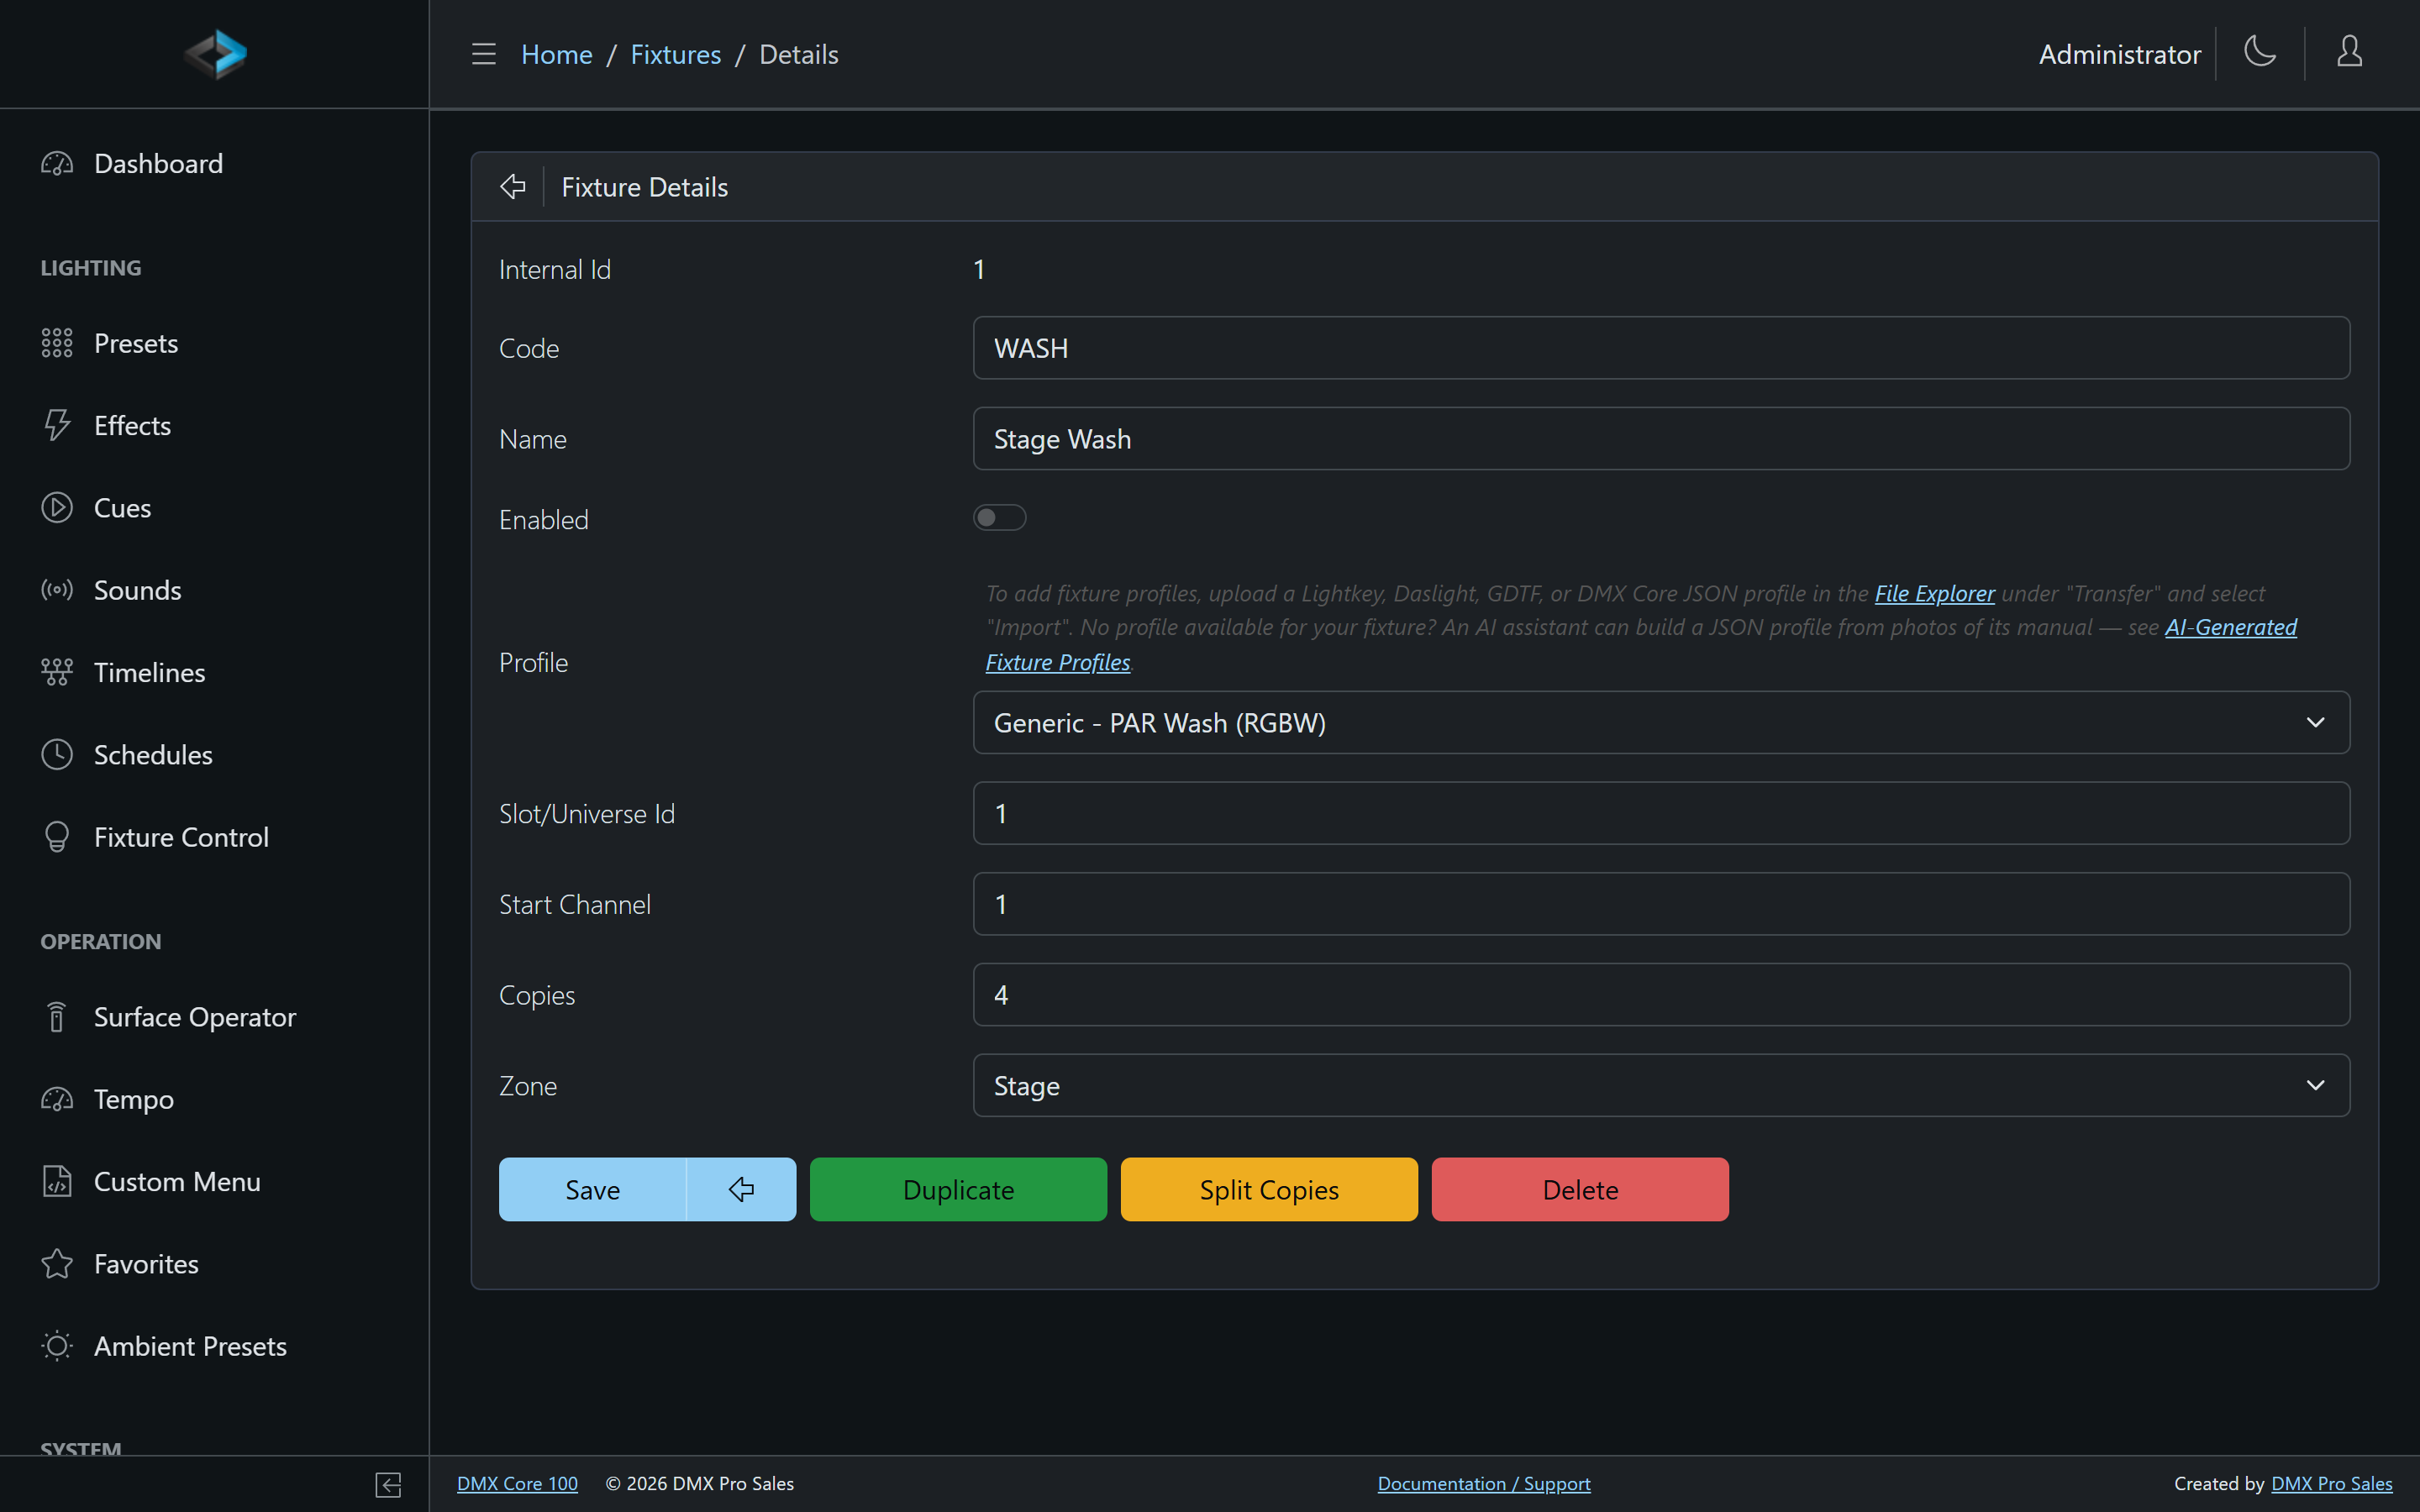
- Go to Lighting Setup > Fixtures in the Web UI
- Click Add to create a new fixture
- Select the Profile from the list of imported profiles
- Select the Personality (channel mode) — this determines which DMX channels the fixture uses
- Set the DMX address (start channel) and universe
- Optionally assign the fixture to a Zone
- Click Save
Personality Selection
Most fixture profiles include multiple personalities (sometimes called “modes”). Each personality defines a different channel layout — for example, a 6-channel mode for basic control or a 16-channel mode with fine control. Choose the personality that matches your fixture’s physical DIP switch or menu setting.
Custom Options
Some fixtures support custom configuration options beyond the standard profile settings. These appear as additional fields in the fixture setup when available.
Managing Fixtures
From the Lighting Setup > Fixtures page in the Web UI, you can:
- Edit a fixture — Click the fixture name to modify its settings
- Enable/Disable — Toggle a fixture on or off without deleting it
- Delete — Remove a fixture from the configuration
Hiding Fixture Functions
If a fixture profile includes functions you don’t use — for example, a strobe channel on a simple par can — you can hide individual functions to keep the Fixture Control view uncluttered.
In the Web UI, open the fixture’s settings and use the Hidden Functions list to select which functions to hide. Hidden functions remain in the profile but are excluded from the Fixture Control display.
Splitting and Combining Fixtures
If you have a fixture with multiple copies, you can split it into individual fixtures — each copy becomes its own entry with an automatically assigned code (e.g., Front_Wash_1, Front_Wash_2). This is useful when you need to assign copies to different zones or adjust settings independently.
To reverse a split, open any of the split fixtures and click Combine. This merges all matching split fixtures back into a single multi-copy fixture. The button shows the total count of fixtures that will be combined.
Fixture Warnings
When editing a fixture, the system checks whether the fixture’s assigned slot has an enabled output configured. If not, a warning is displayed with a direct link to the Output Config page so you can set one up. This helps catch configuration issues before they affect your show.
Exporting Fixtures
You can export your fixture list from Lighting Setup > Fixtures in the Web UI in two formats:
- Excel — Full export with formatting, suitable for documentation
- CSV — Lightweight export for spreadsheet tools and data processing
The export includes fixture names, profiles, personalities, DMX addresses, and universe assignments — useful for documentation or handoff to a lighting programmer.
Multi-Function Fixtures
Fixtures with multiple instances of the same function type (e.g., dual color wheels, multiple gobos) are fully supported. The system automatically detects and exposes all function instances for control.